Monday, 10 July 2017

Snails Trail Block


  This week we have made the Snails Trail Block.
 
     I have always wanted to make, but never did until now.
 
    This block will be 12 inches plus seam allowance.
 
    Follow the pictures on how to draw up the block.


Draw a twelve inch square.
 
Place a mark at the halfway point (six inches) on each of the lines.
 
Then connect to form another square on point.


Again place a mark at the halfway point on each of the lines,
and connect for a smaller square.


Mark again halfway and connect to
form another square on point.


This time when you find the halfway points
you will mark the lines diagonally through.
 
You can draw a template up of the three different size triangles and
one square, don't forget to add the seam allowance.
 
You will need two fabric colours.
 
 
For quicker cutting of pieces, I worked out
the size of squares to cut for this block.
 
Click on the picture above if you can't see the size of the squares.
 
Cut the three largest (each colour way) of each squares diagonally once.
(you will have twelve triangles altogether) 
 
 
Sew the four smallest squares together into a four patch.
 
Trim up to 4 3/4 inch square.

 
Place the smallest triangles as above, pin in place and sew.
 
Trim up to 6 1/2 inch square.

 
Do the same with the next size triangles.
 
Then trim to a 9 inch square.

 
Sew the last triangles on.
 
This block should be 12 1/2 inches square.

 
I like to sew around the block 1/8 inch around the edge to stop it from distorting.
 
Then press.
 
 
Hope you have enjoyed making this block.


Thanks for stopping by
Carol 🌹
 

Saturday, 24 June 2017

Trunk Show

 
       Today I went along to Jemima's Trunk Show at Carols of Midland
for her first book, Weekend Quilting.


It was a full house.
 
 
Jemima's book Weekend Quilting.
 
 
There were some lovely stories behind the making of the quilts.


And as always there was a great morning tea.
 
 
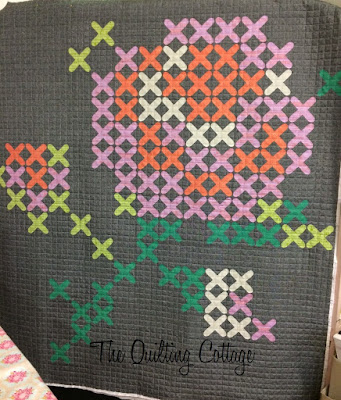
Viv's Rose is one of Jemima's latest patterns
and was hot of the quilting machine this morning.
 
 
It was a great morning, well done Jemima.


Thanks for stopping by

Carol 🌹


Sunday, 18 June 2017

Drunkards Path Block

 
This week we are doing a curved technique.
 
All the blocks that we make will be 12 inches plus the seam.
 
First you will need to draw up the design for a template.


Draw up a six inch square, with a compass opened up to 5 inches,
put the point at a corner and draw an arc from one side of the square to the other.


Then with a ruler placed diagonally across the arc and
corner points, place a mark through the arc line.
 
This is your centre point when pining.


Trace these two pieces onto templastic.
 
Draw onto the back side of your fabric - the drawing line will be your sewing line.
 
Cut a ¼  inch away from the line - this is your seam allowance.


You will need four of each in a combination of fabrics.


Don't forget the centre marking.


Arrange to your liking.


Lay the convex piece face up and the concave piece face down.
 
Match up the centre point and pin through the sewing line, then
 pin ends so they are in line with each other.


I like to pin a lot to smooth out the curve.


Sew from the edge of the fabric, and off the end following the line.
 
I like to sew over the pins so it keeps everything in place until it is sewn.
 
Sew all four units together.


Sew the two tops units together.


Then the bottom two.


Sew the two halves together.
 
I like to sew around the block 1/8 inch around the edge to stop it from distorting.
 
Then press.
 
 
Hope you have enjoyed making this block.


Thanks for stopping by
Carol 🌹


Sunday, 11 June 2017

Attic Window

 
I have a group of  six ladies that come every Monday for sewing, chatting and fixing the world problems  😊
 
We have decided to do a Technique's Quilt so every one picked a block that they would like to learn and first up is Attic Window's.
 
I will be making a block every week and using fabrics from my stash.
 
I have decided to do a step by step tutorial so if you would like to follow you are quite welcome to.


From my stash.


Cut 4 squares x 5 inches
Cut 8 strips x 2 inches x 7½ inches
for the window ledge use a light and dark fabric so it gives the illusion of light and shadow.


I am using four colour ways.


On the wrong side of the square fabrics, lower right, place a dot ¼ inch from the corner.


Sew strip onto left hand side - face to face, letting it over hang at the bottom.


 Sew to the ¼ inch mark and do a back stitch.


Fold back, finger press.


Place bottom strip on - face to face, letting it cross and overlap the side strip.


Sew seam and stop at the ¼ inch mark.


Fold back, finger press.


Fold the block diagonally making sure your strips line up straight with each other. Place your ruler on the 45° line of the fold.


Now mark a line on the strip fabric following the fold line.


*Pin in place and sew (do a back stitch) from the corner seam to the edge.
 *Make sure the seams of the strip lay towards the square when you start sewing the mitre.


Now you have the perfect mitred corner
Cut of waste ¼ inch from the sewing line.


Make up the other blocks.


 Sew two blocks together for each row.


Then join the rows together.


I like to sew around the block 1/8 inch around the edge to stop it from distorting.


Then press.
 
 Hope you enjoyed making this block.
 
Thanks for stopping by
Carol 🌹